Image Source: Google
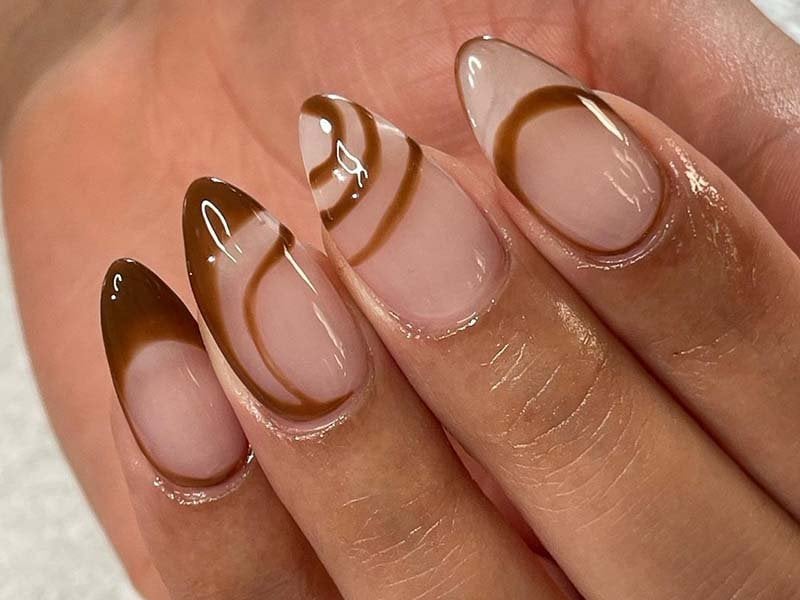
Are you tired of your regular nail polish chipping within a few days? Do you want salon-quality, long-lasting nails without the hefty price tag? Look no further than the best gel manicure! With the right tools and techniques, you can achieve stunning, chip-resistant nails in the comfort of your own home. This ultimate guide will provide you with everything you need to know to achieve the best gel manicure at home.
What is a Gel Manicure?
The best gel manicure is a type of nail treatment that uses a special gel polish to achieve a long-lasting and chip-resistant finish. Unlike traditional nail polishes, which dry and harden when exposed to air, gel polishes require a UV or LED lamp to cure and set. This curing process creates a strong bond between the gel polish and the natural nail, resulting in nails that can last for up to two weeks without chipping or peeling.
Preparing Your Nails
Before you start applying gel polish, it is essential to prepare your nails properly. Start by removing any existing nail polish using an acetone-based nail polish remover. Trim and shape your nails using a file, and gently push back your cuticles using a cuticle pusher. It is important to have clean, dry nails before applying gel polish to ensure optimal adhesion.
Applying the Gel Polish
Now that your nails are prepped, it's time to apply the gel polish. Start by applying a thin layer of base coat to each nail, making sure to seal the edges. Avoid getting any base coat on your cuticles or skin, as this can cause lifting and peeling. Once you have applied the base coat, cure your nails under a UV or LED lamp for the recommended time specified by the gel polish manufacturer.
After curing the base coat, it's time to apply the color. Apply a thin, even layer of gel polish to each nail, again ensuring that you seal the edges. Be careful not to flood your cuticles or skin with gel polish, as this can lead to lifting and peeling. Cure your nails under the lamp for the recommended time, and repeat this process for a second coat if desired.
Sealing and Finishing
Once you have applied the color, it's time to seal and finish your nails. Apply a thin layer of top coat to each nail, again making sure to seal the edges. The top coat is what gives your nails a shiny and long-lasting finish. Cure your nails under the lamp one final time, and then use a lint-free wipe soaked in isopropyl alcohol to remove any sticky residue left on the nails.
Tips for Long-lasting Gel Nails
To ensure that your gel manicure lasts as long as possible, there are a few tips you should keep in mind:
- Avoid using your nails as tools. While gel polish is generally more durable than regular polish, excessive force or pressure can still cause your nails to chip or break.
- Wear gloves when doing household chores or any activities that may expose your nails to harsh chemicals or excessive moisture.
- Apply cuticle oil daily to keep your nails hydrated and prevent them from becoming brittle or dry.
- Avoid picking or peeling your gel manicure. If you want to remove the gel polish, it is best to soak your nails in acetone and gently remove the softened gel with a wooden cuticle pusher.
By following these tips and properly maintaining your gel manicure, you can enjoy chip-free and stunning nails for weeks on end!
In conclusion, achieving the best gel manicure at home is easier than you think. With the right tools, techniques, and a little bit of practice, you can achieve long-lasting and stunning nails that rival any salon. Follow this ultimate guide, and soon you'll be enjoying chip-resistant and beautiful nails in the comfort of your own home.